
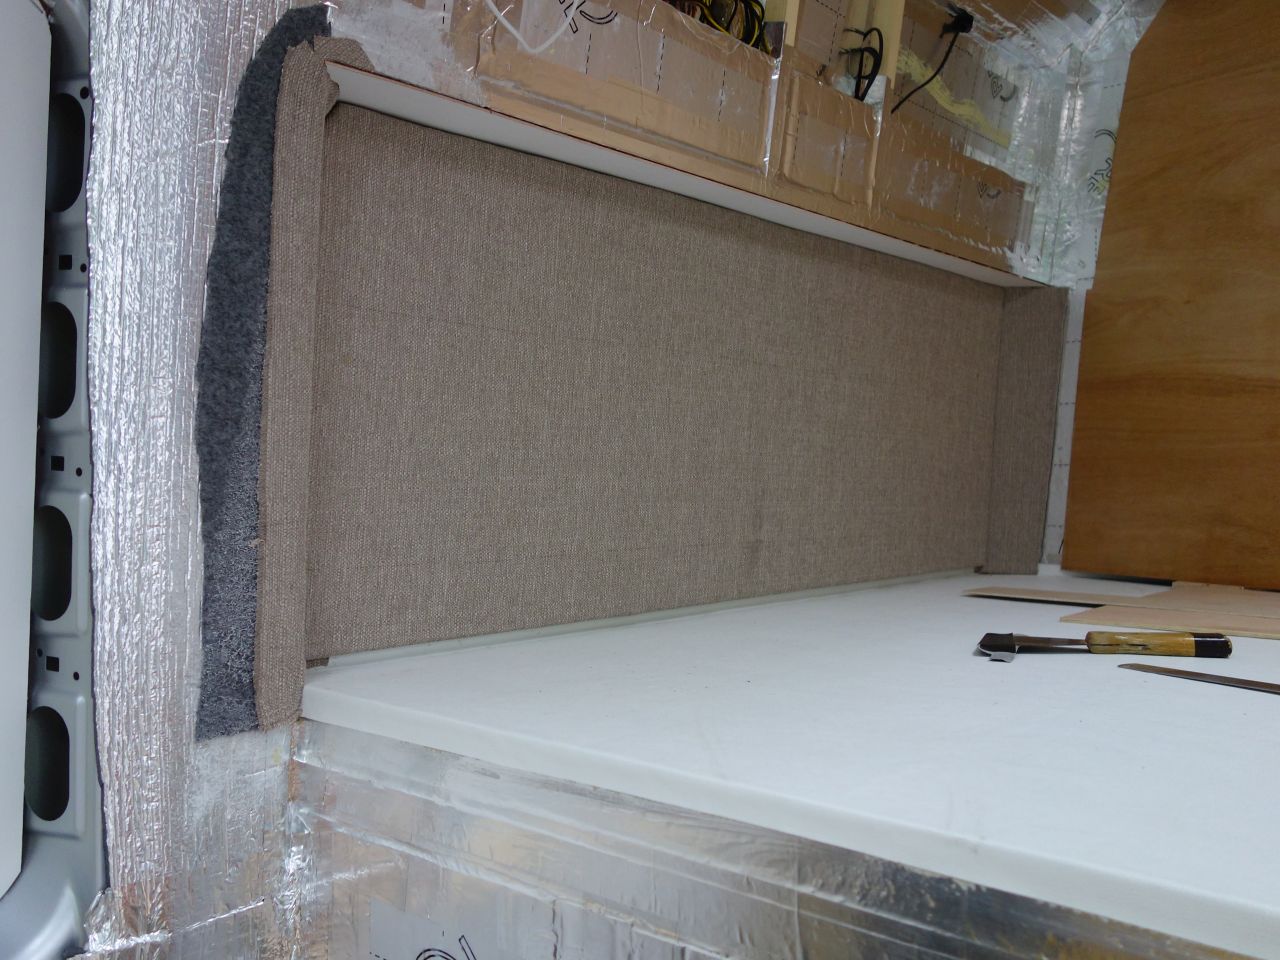
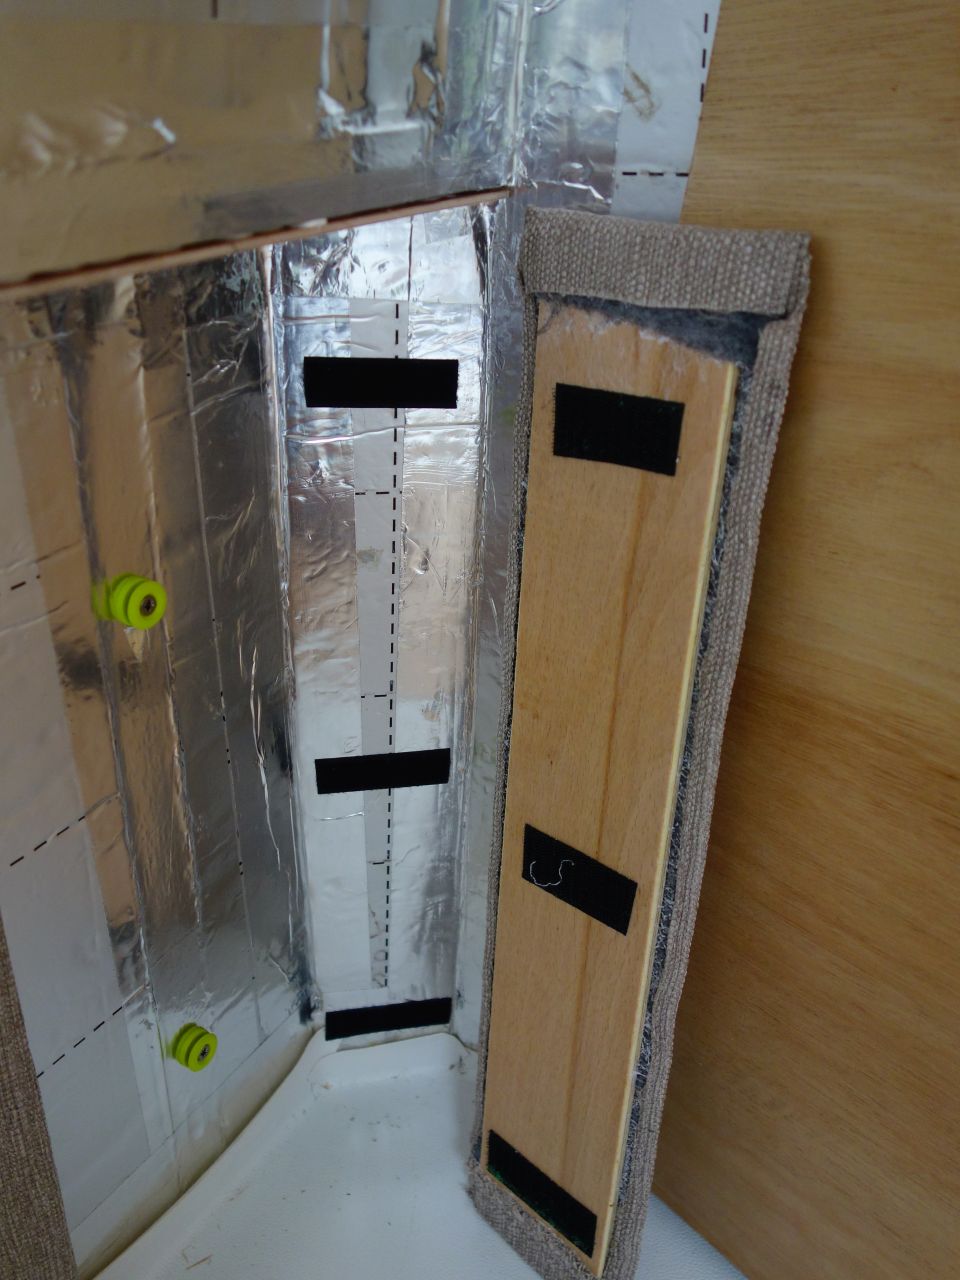
The panels around the bed are going to be fabric covered. I needed to start fitting the covering at the head end of the bed before permanently fixing the toilet wall (so that the cloth disappeared neatly behind the toilet wall). I’d bought a light grey Veltrim (“silver” I think…) for this, but when I’d put up a little patch of it, I wasn’t happy. It didn’t look ‘right’. I ended up with a brown, hessian type of material instead and used the Veltrim as a sort of underlay – stuck directly onto the self adhesive foam insulation on the ‘C’ pillar.

There’s a sort of alcove at the head and foot of the bed – at the head end, the underside of the alcove is lined vinyl faced wall board (being stuck in place in the photo above).
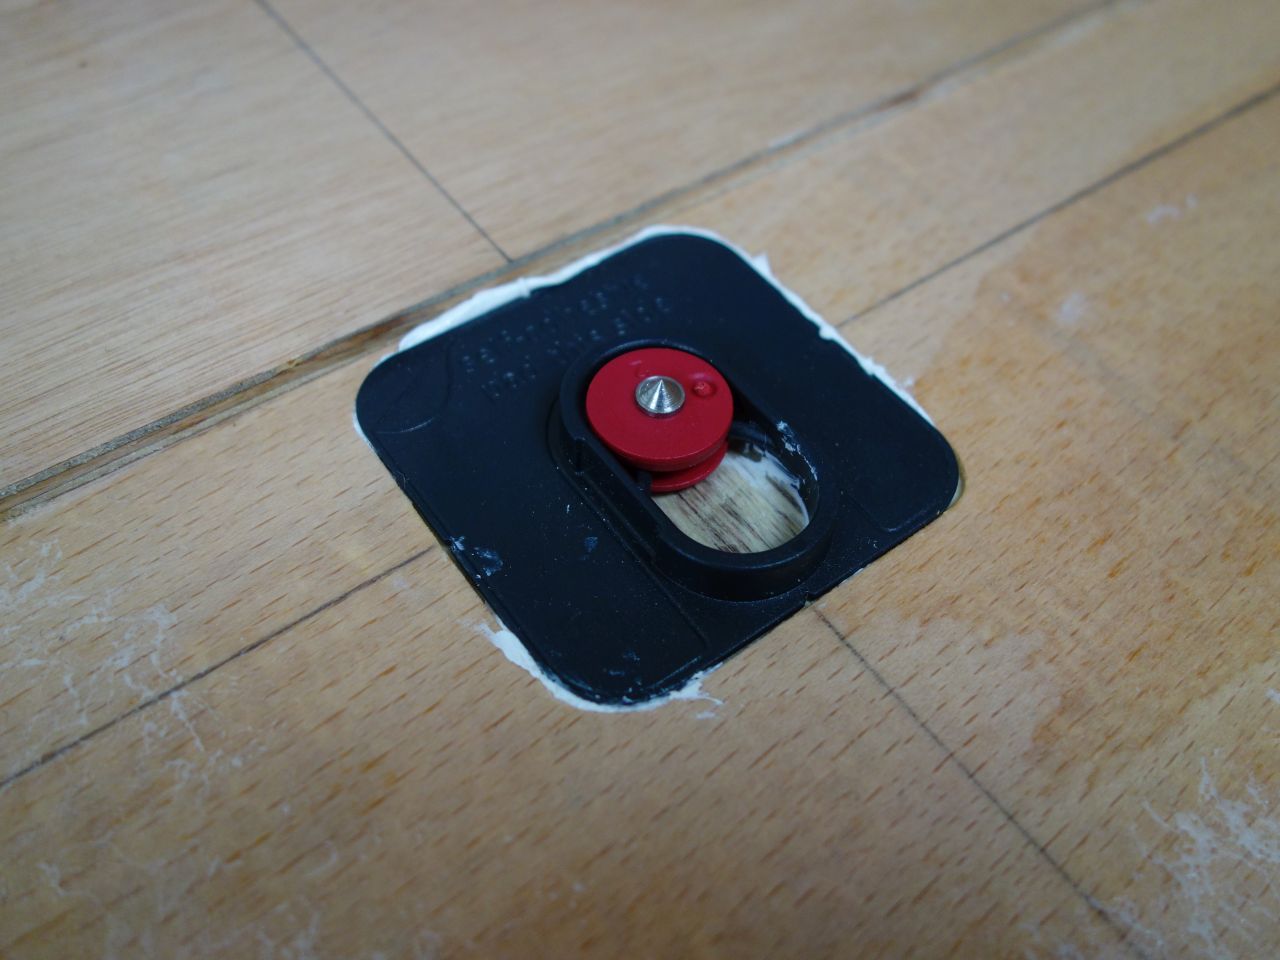
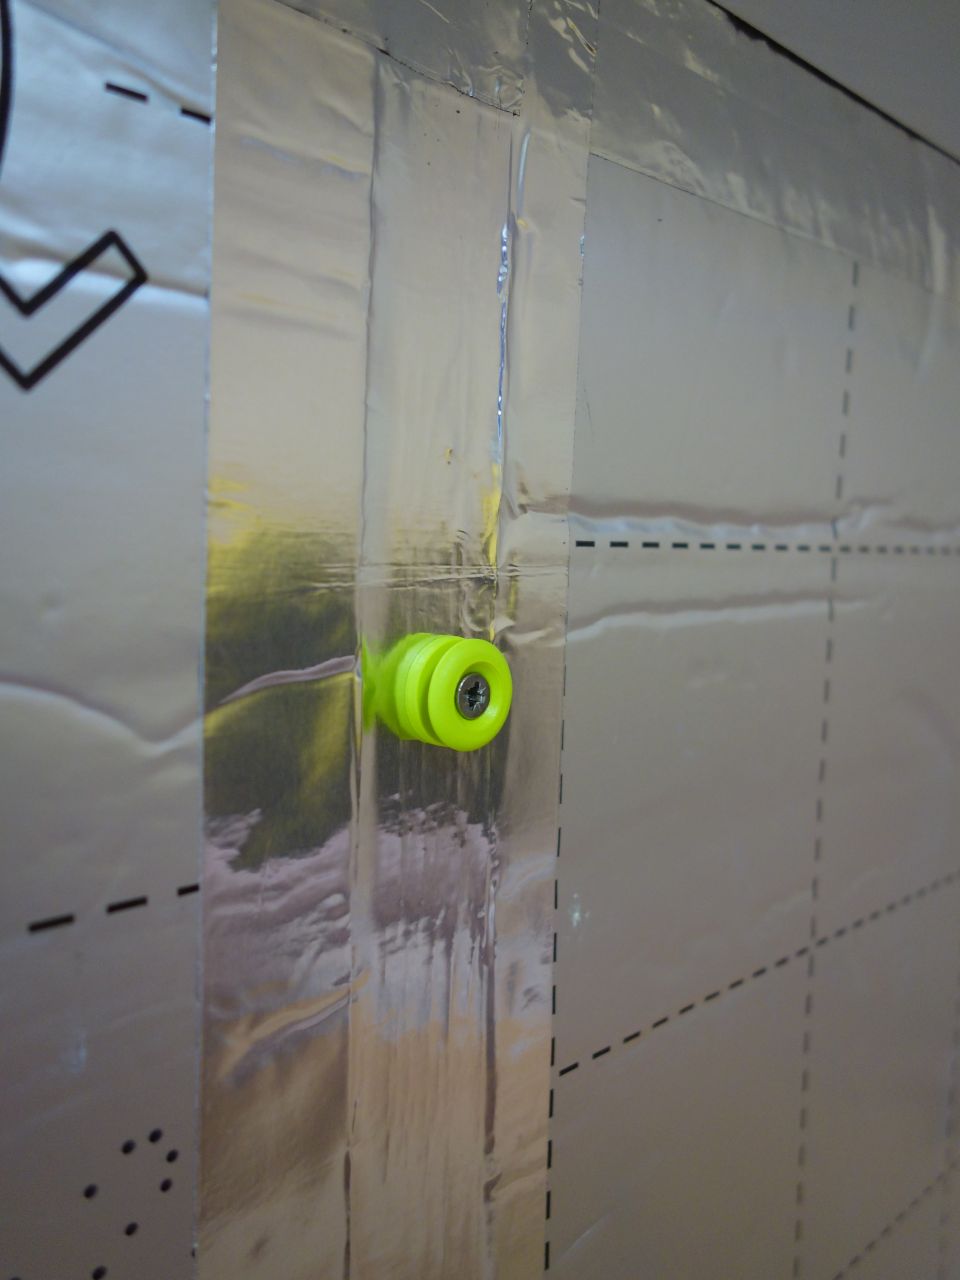
I wanted the main fabric covered panels to be removable so that they could be re-upholstered if/when the cloth got grubby. I made the main panels out of 6mm ply, with doublers glued to them to give enough thickness to hold ‘Button Fix’ hidden fasteners. The fasteners were spaced to suit the timber uprights between the insulation.
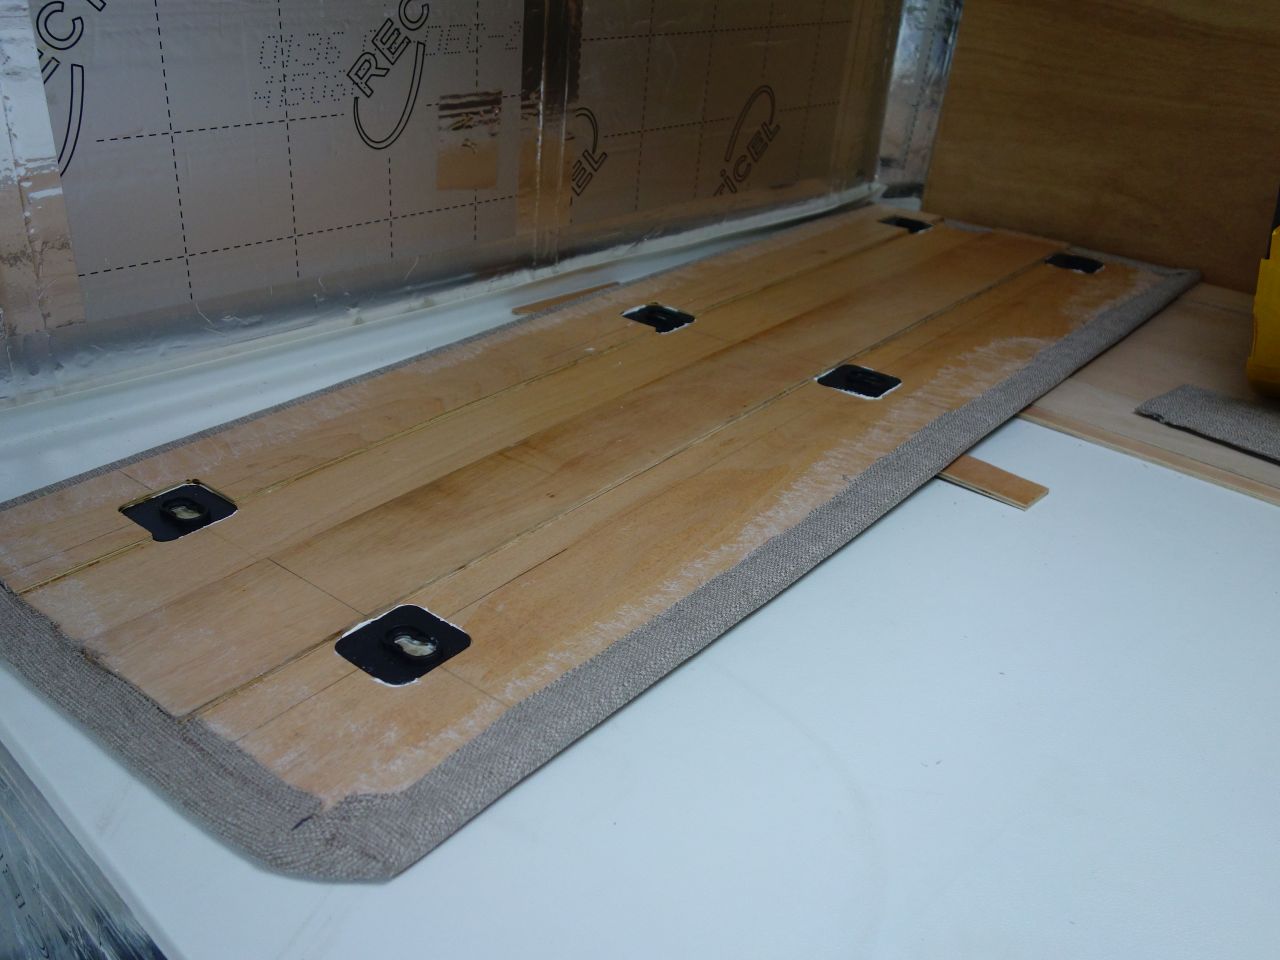
You fit a spiked button temporarily, hold the panel in position and give it a whack, then fit a button where the spike mark is
When you’ve finished, the panel just* clips into place (*quite a lot of force is needed!). I’ve arranged the clips to slide upwards, so I’m left with a ~15mm gap at the bottom of the panels, but this will be hidden by the mattress.
The small panels in the rear corners are trapped behind the side / rear panels and held with a few pieces of velcro.
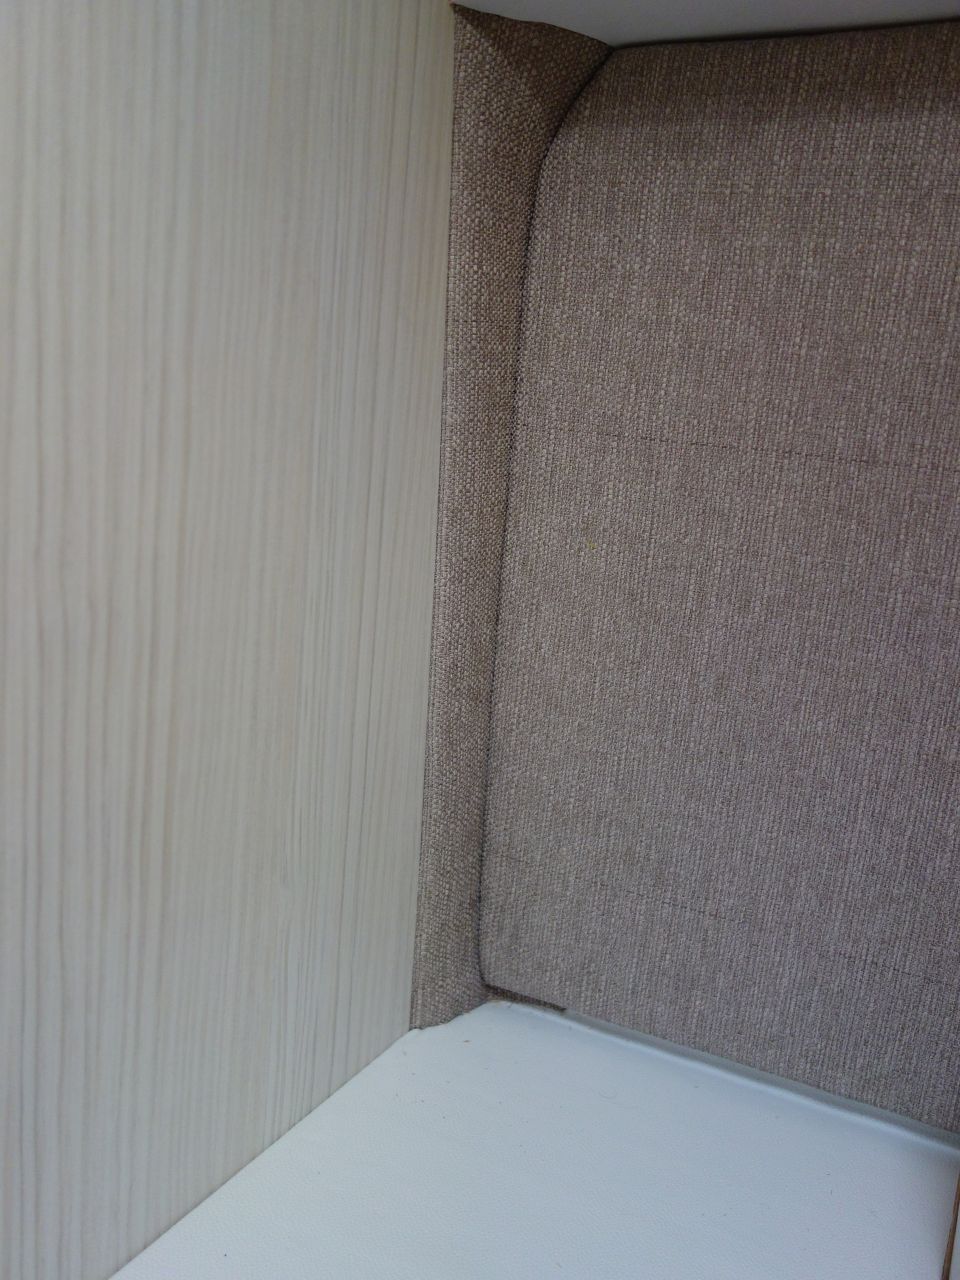
Overall, it seems to work well, and I’m pleased with it – I think it looked good once the toilet wall was fitted.
I also tackled the cubby over the cab. After a lot of thinking and pondering I decided to squander the space either side of it and just panel it off flush with the plastic tray. 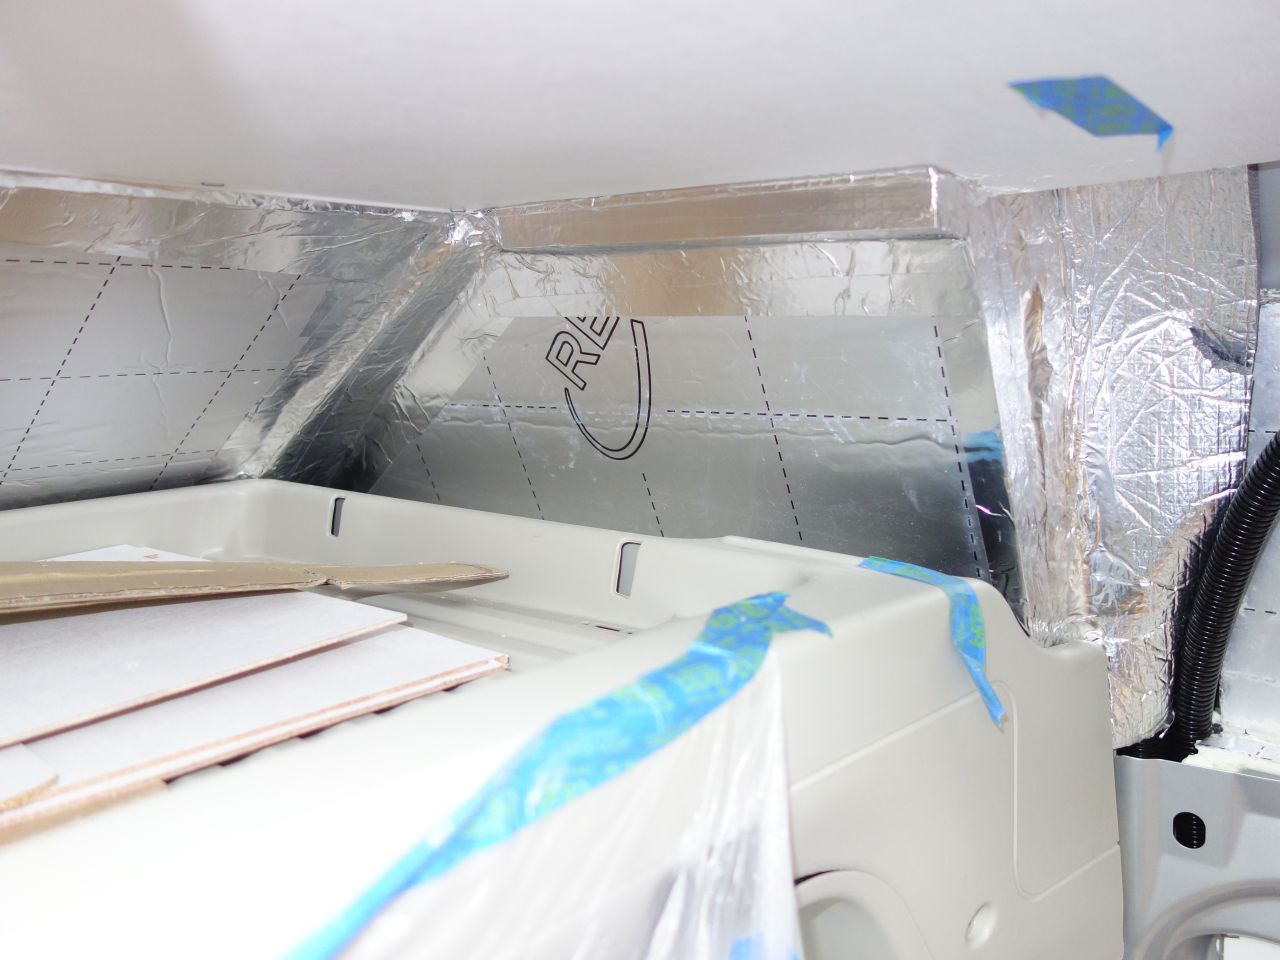 A sheet of 3mm ply covered in Veltrim slipped down the front of the cubby (trapped by the tray at the bottom and stapled into one of the ceiling joint strips at the top)
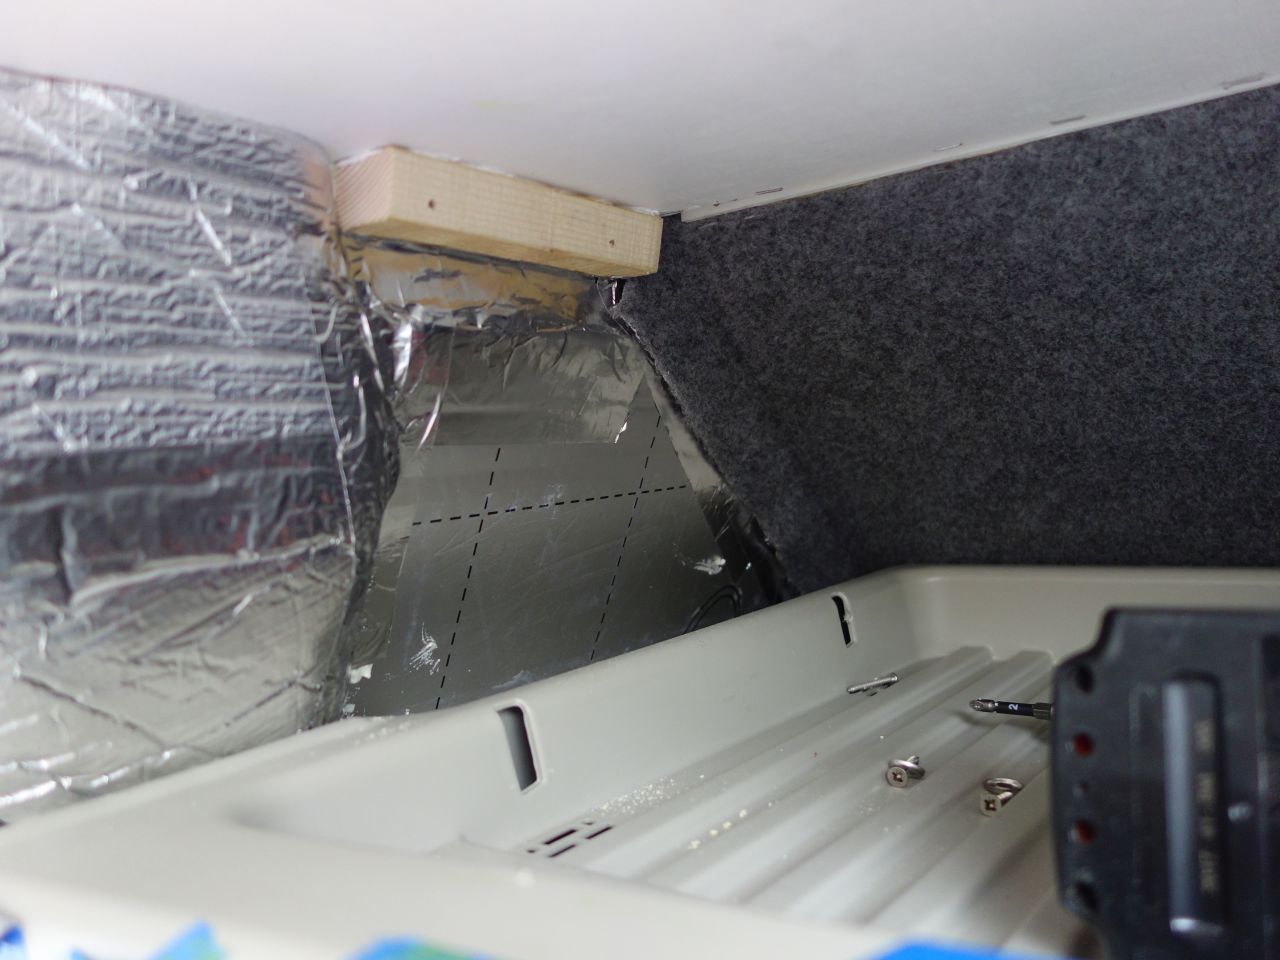
and I made a pair of Veltrim covered ply ‘cheeks’ that fitted either side (screwed into battens glued to the roof at the top & the plastic tray at the bottom:
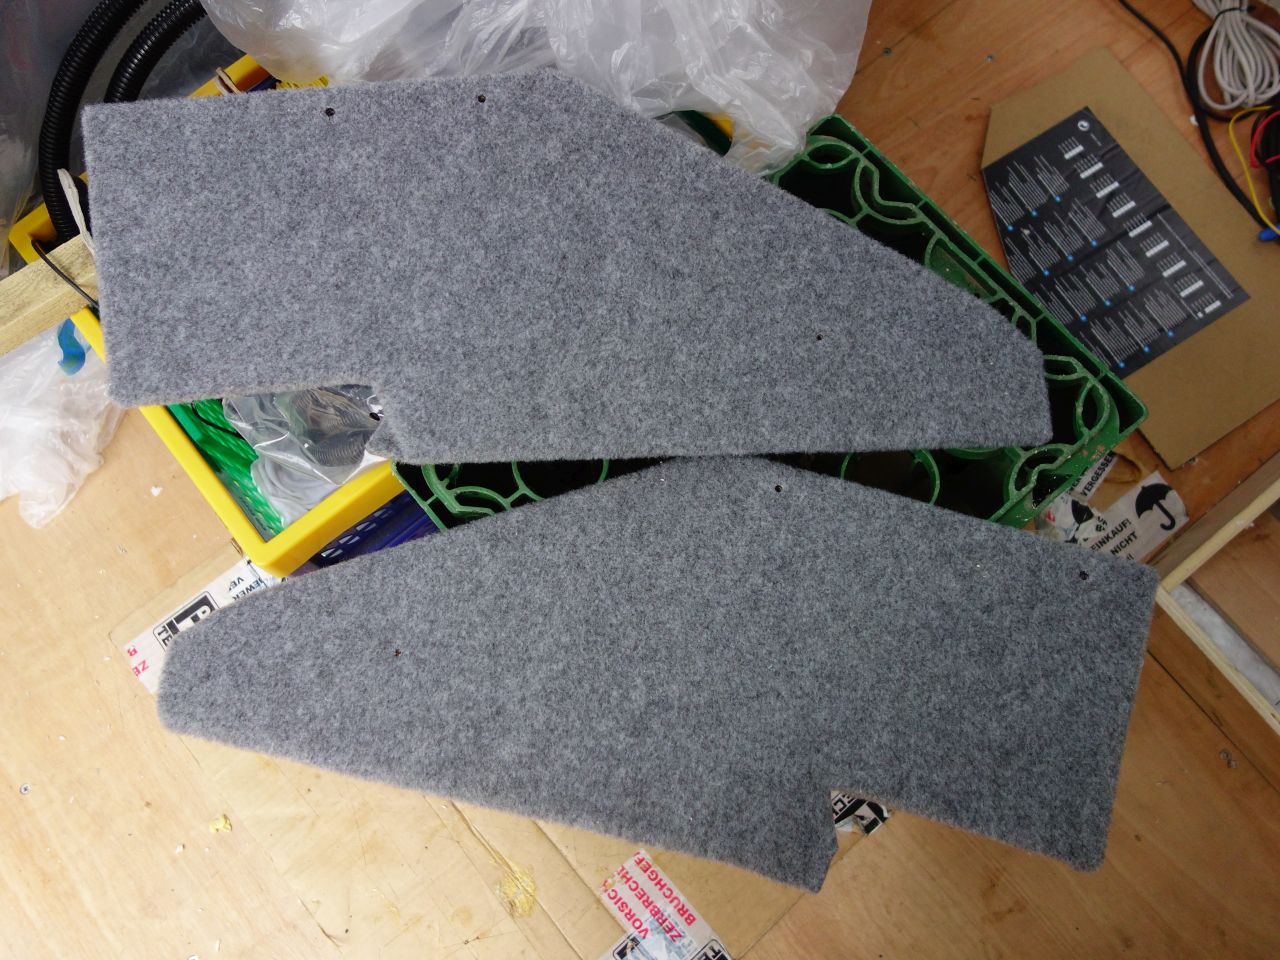
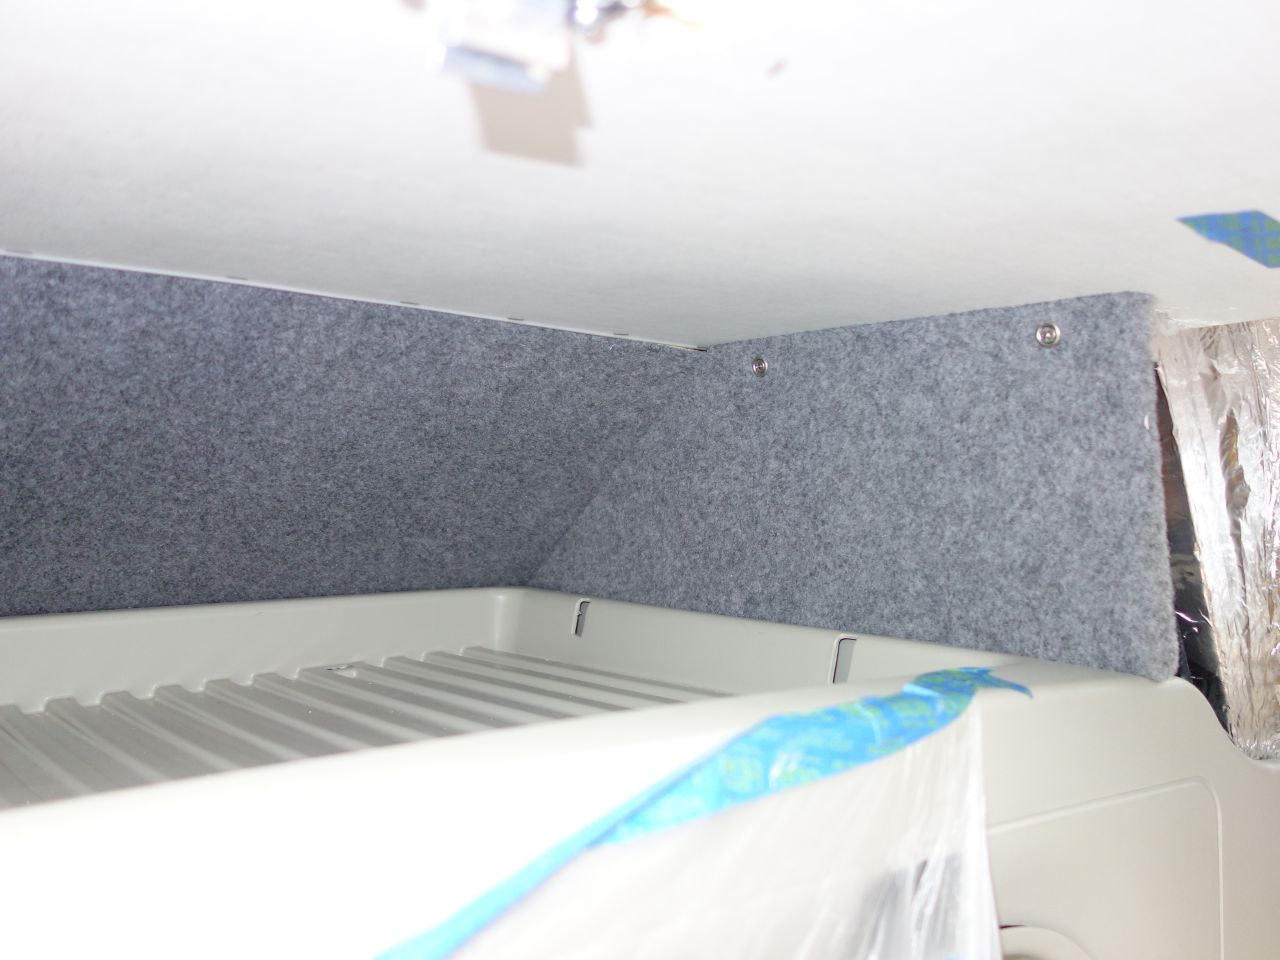
(I screwed through the plastic tray and into the ply where the two rectangular cut outs are).
There’ll be a locker on the driver’s side which will close the end off, and I’ll have to cobble something together around the sliding door track on the passenger side, but overall, I think it’s tidy enough.
Looks great! Came across your website while searching about electrical stuff, very clear and informative, thx so much 😁
Would you please post details or a link to the fabric (not carpet) that you used to do the panels? Thx 👍
Thanks very much – I’ll finish writing it one day! 🙂
I’m not sure I can help much with the fabric – there’s a large fabric remnants shop (Aberkhan) nearby and it all came from there (the brown ‘hessian’ type material and the patterned stuff).
It was a case of wandering around to see what they had on the day (they were classed as upholstery fabrics, btw.)
I see that they have a web shop, but it’s much better if you can go and handle the material before you buy it.
https://www.abakhan.co.uk/clearance/clearance-fabric.html
🙏😁